User studio
This guide will show you the advanced features available for your Studio
For a quick start guide for the Studio visit this section
Configure connection
To make a new live connection you can click on the user on the left side, or just drag and drop the user to a free call slot
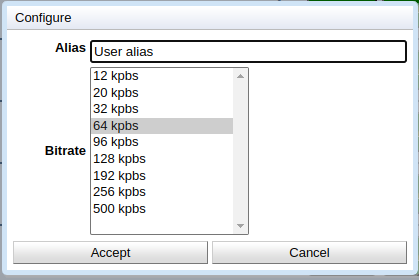
The following dialog will pop up to configure the call
You can define an alias for your call, it will appear between (…) to help you identify the location of each call when you have lots of journalists connected at once
You can make the call with the default bitrate of your studio. Or you can choose to override the bitrate for any call
 |
|---|
| Configure call settings |
SIP or VOIP call
If you want to make a SIP or VOIP call, you can click on the phone icon or drag and drop to a free call slot. Note: this feature needs to be enabled by the administrator
 |
|---|
| SIP or VOIP call |
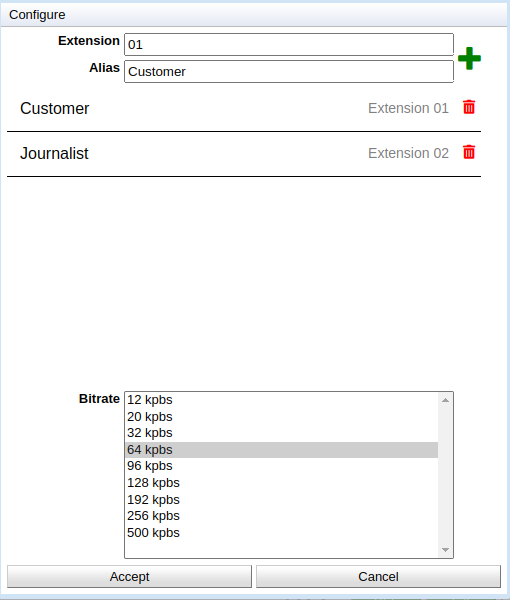
For a SIP call enter the extension
For a local phone call enter 0 and the phone number
For an internation call (if enabled by the administrator) enter 00 and the phone number with the country international code
Then select the bitrate, only for calls to IP Codecs in OPUS or G722 formats. Phone calls use G711 64kbps codec
And click accept
 |
|---|
| SIP or VOIP call extension |
Connection status
Once connected you can view (from left to right)
- Cancel, to hang up the call
- Call status
- Alias (if any)
- User name
- Call statistics (If enabled by the administrator)
- Audio DSP configuration (If enabled by the administrator)
 |
|---|
| Connected call |
Call stats
To review the call statistics click on the stats icon
 |
|---|
| Open call stats |
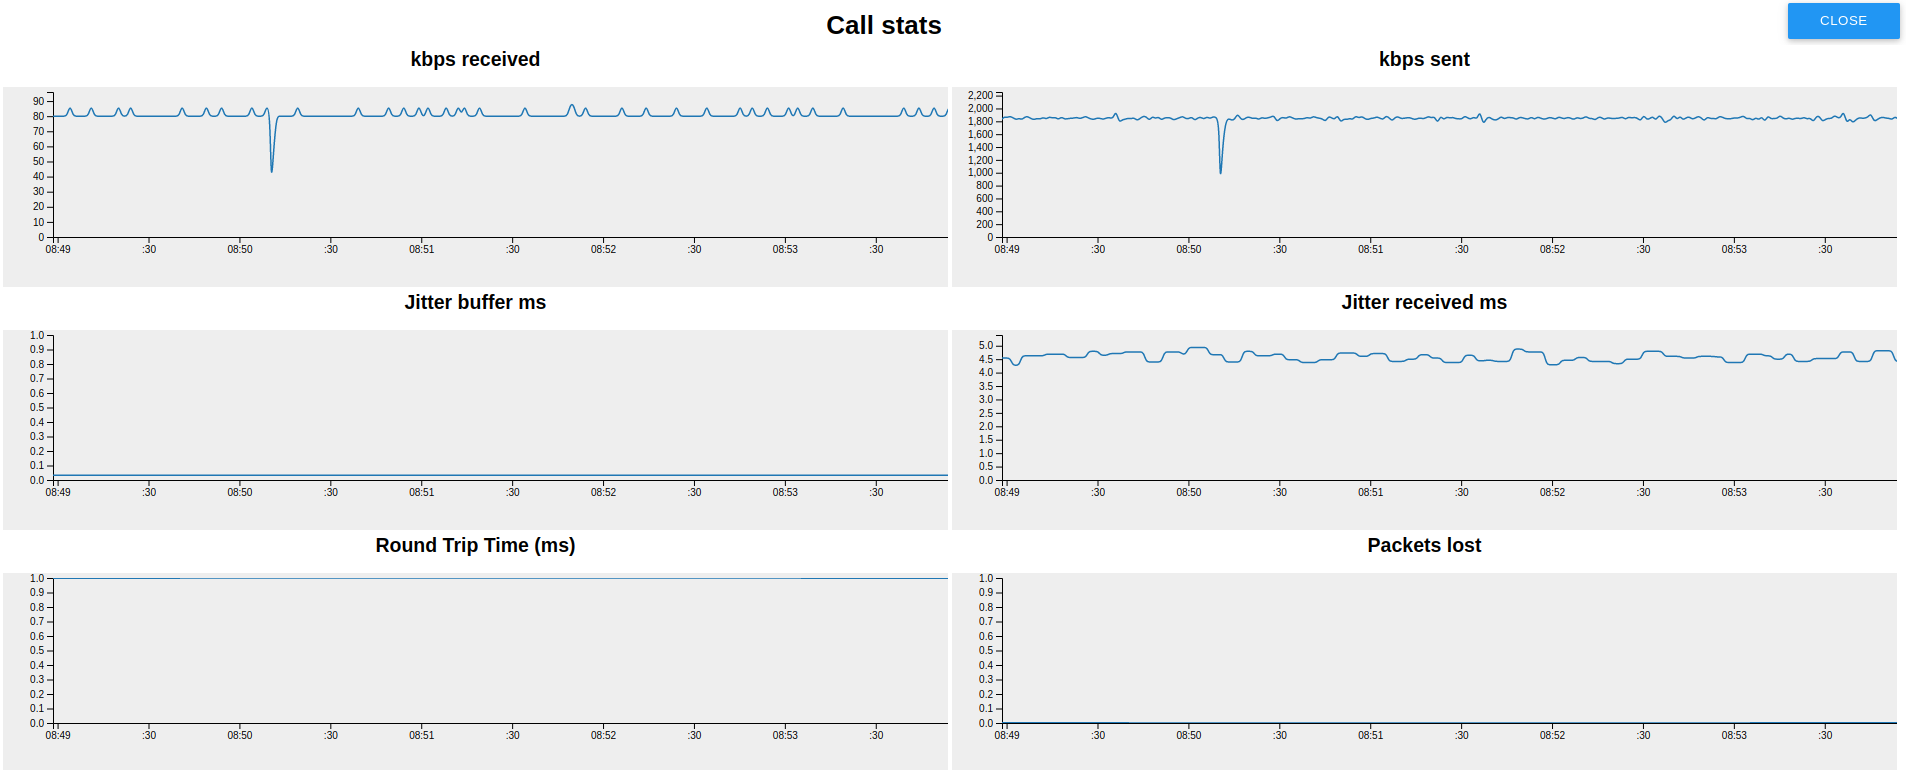
In the top row you can view the data received / sent in kpbs
In the middle row you can review the jitter buffer in ms. The amount of buffer used to prevent data shortage. The next graph shows the jitter in the the received data in ms
In the bottom row you can view the Round Trip Time, a time a packet takes to go to the journalist and back. And the number of network packets lost
 |
|---|
| Call stats |
DSP
Click on the DSP button to configure the audio for any call. You can only access this settings while the call is in connected state. Once a call is hang up the settings will reset to your defaults
 |
|---|
| Open audio DSP settings |
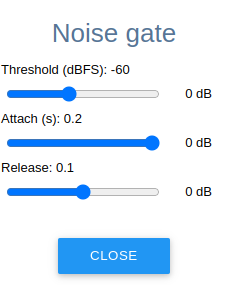
Here you can configure the noise gate:
- Threshold to activate the noise gate in dBFS
- Attack time, in seconds
- Release time, in seconds
 |
|---|
| Noise gate configuration |
Audio controls
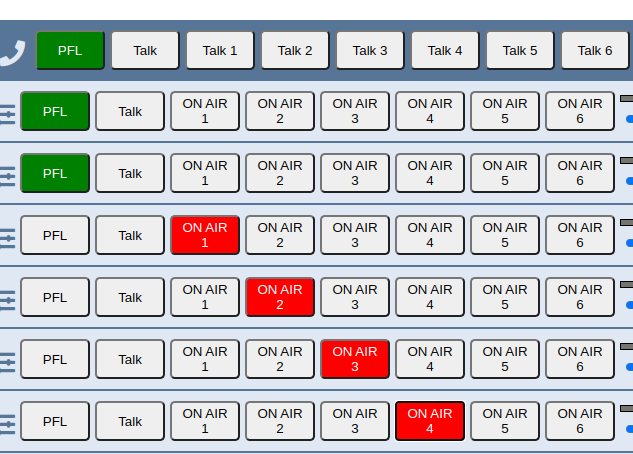
In the top row you have the audio controls that apply to every call, from left to right:
- PFL, enable / disable PFL for every call
- Talk, enable / disable Talk for every call
- Talk 1, 2, … enable / disable Talk for every call with On Air 1, 2 … activated
For each call you can individually control the audio, from left to right
- PFL, enable / disable PFL for a single call
- Talk, enable / disable Talk for a single call
- On Air 1, 2, … Enable / disable On Air for a single call
 |
|---|
| Audio controls |
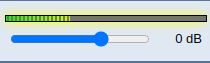
Vu-meter / fader
For each call you have an individual vu-meter to check the level of the audio signal
You can also control de audio gain with the fader
 |
|---|
| Vu-meter and fader |
Audio Matrix
Click the matrix icon on the top bar to configure the embedded audio matrix
 |
|---|
| Open audio matrix configuration |
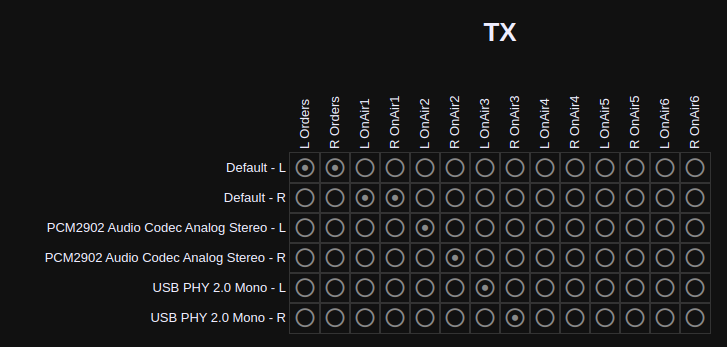
On the top group you can configure the audio input into the PC
On the left side you have the audio devices available on your PC
On the top side you have the audio groups
You need to connect how to route audio from input to your external users, through channels
In the example:
- Audio from Default audio card left channels goes to Orders (Mono)
- Audio from Default audio card righ channels gost to On Air 1 (Mono)
- Audio from PCM2902 goes to On Air 2 (Stereo)
- …
 |
|---|
| Input audio matrix |
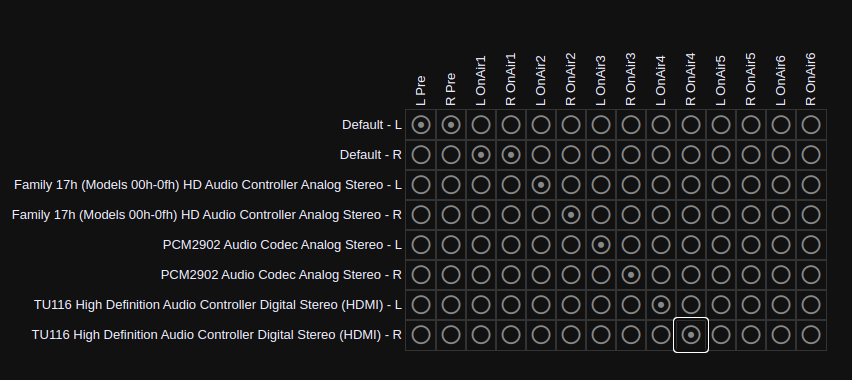
On the bottom group you can configure the audio output from your PC
On the left side you have the audio devices available on your PC
On the top you have the audio groups
You need to connect the channels with your external users to the audio outputs in your PC
In this example:
- Pre audio goes into left channel of Default audio card (Mono)
- On Air 1 audio goes into right channel of Default audio card (Mono)
- On Air 2 audio goes into Family 17h (Stereo
- …
 |
|---|
| Output audio matrix |